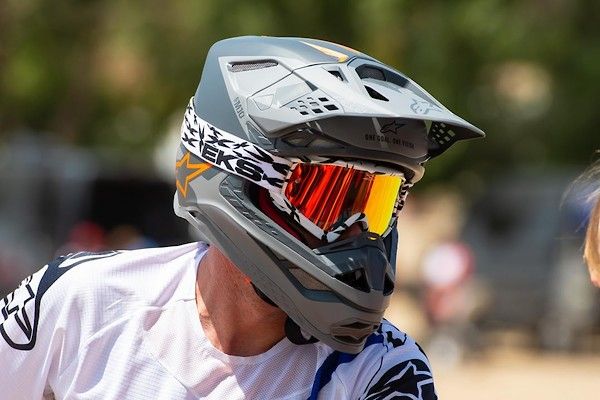
Ensuring a proper fit for a child’s off-road helmet is crucial for maximizing safety and comfort while riding. A helmet that fits correctly can significantly reduce the risk of head injuries in the event of an accident.
This guide will provide step-by-step instructions on how to fit a youth off-road helmet properly, helping parents and young riders make informed choices.
Step 1: Choose the Right Size
The first step in fitting a youth off-road helmet is to determine the correct size. Helmets come in various sizes, typically measured in centimeters or inches. To find the right size for your child, follow these steps:
- Measure the Head Circumference: Use a soft measuring tape to measure the circumference of your child’s head. Wrap the tape around the largest part of the head, which is usually just above the eyebrows and around the back of the skull. Ensure the tape is level and snug but not too tight.
- Refer to the Manufacturer’s Sizing Chart: Once you have the head measurement, compare it to the manufacturer’s sizing chart. Each brand may have slightly different sizing, so it’s essential to check the specific chart for the helmet you are considering.
- Try on Multiple Sizes: If you have the opportunity, visit a store that specializes in off-road gear. Trying on different helmets can help you find the best fit, as some brands may fit differently than others.
Step 2: Adjust the Chin Strap
Once you have selected a helmet that fits snugly around your child’s head, the next step is to adjust the chin strap. A properly adjusted chin strap is vital for keeping the helmet securely in place. Follow these steps:
- Buckle the Chin Strap: Have your child put the helmet on and fasten the chin strap.
- Adjust for Snugness: The chin strap should be snug but comfortable. You should be able to fit one or two fingers between the strap and your child’s chin. If it’s too loose or too tight, adjust the strap accordingly.
- Position the Straps: Ensure that the straps are positioned correctly. They should form a “V” shape under the ears. If the straps are not aligned properly, it can affect the helmet’s fit and security.

Step 3: Check the Helmet Position
The helmet should sit correctly on your child’s head to offer maximum protection. Follow these guidelines to ensure proper helmet positioning:
- Front to Back: The helmet should sit low on the forehead, about one to two finger widths above the eyebrows. This positioning helps protect the forehead while still allowing for good visibility.
- Side to Side: The helmet should fit snugly against the sides of the head without excessive pressure. There should be minimal movement when the head is tilted from side to side.
- Back of the Helmet: The back of the helmet should cover the base of the skull. If it rides too high or falls too low, it may not provide adequate protection.
Step 4: Assess Comfort and Stability
Once the helmet is on and adjusted, it’s essential to assess its comfort and stability. A helmet that is uncomfortable will likely be removed or not worn correctly while riding.
- Check for Pressure Points: Ask your child to move their head around while wearing the helmet. They should not feel any pressure points or discomfort. If they do, consider trying a different size or model.
- Shake Test: With the helmet securely fastened, have your child gently shake their head from side to side and up and down. The helmet should stay in place without shifting. If it moves significantly, it may be too loose.
- Breathing and Vision: Ensure that the helmet does not obstruct your child’s vision and allows for easy breathing. The face shield (if equipped) should provide a clear view without distortion.
Step 5: Final Adjustments and Safety Checks
Before heading out on the trail, make sure to perform some final adjustments and safety checks:
- Recheck All Straps: Double-check that all straps are secure and properly adjusted. It’s a good practice to review the fit every time the helmet is worn, as hair and other factors may affect the fit.
- Inspect for Damage: Regularly inspect the helmet for any signs of wear or damage. If the helmet has been involved in an accident, it should be replaced, even if there are no visible signs of damage.
- Encourage Helmet Use: Teach your child the importance of wearing their helmet every time they ride, no matter how short the trip may be. Consistent helmet use helps develop safe riding habits.
Conclusion
Fitting a youth off-road helmet properly is vital for ensuring safety while riding. By following these step-by-step instructions, parents and young riders can find a helmet that fits snugly and securely, providing the necessary protection for off-road adventures.
Remember, a well-fitted helmet can make all the difference in the event of an accident, allowing young riders to enjoy their experiences with confidence and peace of mind.


